Kc-hilites KC #324 (120w) LED Light Bar System Instructions Manuel d'utilisateur

Naviguer en ligne ou télécharger Manuel d'utilisateur pour Pour la voiture Kc-hilites KC #324 (120w) LED Light Bar System Instructions. KC HiLiTES KC #324 (120w) LED Light Bar System Instructions User Manual Manuel d'utilisatio

  • Télécharger
  • Ajouter à mon manuel
  • Imprimer
  • Page
    / 1
  • Table des matières
  • MARQUE LIVRES
  • Noté. / 5. Basé sur avis des utilisateurs
Vue de la page 0
Bolts with Nuts
on Brackets
Thanks for choosing a KC HiLiTES product. We take pride in building the highest quality, best engineered
systems possible. Your satisfaction with our product is important, so if you have any questions, please call our
customer service line at 800-528-0950.
WIRING YOUR LIGHT
1. Remove the fuse from the harness. Find a suitable location inside the passenger compartment for
your switch. Mark and drill two 1/8” holes, insert screws and loosely install the panel to ensure fit.
Remove panel, install switch, and slide panel with switch, back in place. (Do not tighten. The
panel and switch will be removed when attaching wires.)
2. Connect the wire to the light and route the harness back toward the 12V battery or power source.
Anchor the ground and power terminals near the battery/power source ensuring they are close
enough to attach later. (DO NOT CONNECT TO BATTERY AT THIS TIME)
3. Continue routing the balance of the harness into the vehicle toward the switch. Once the wires are
inside the vehicle near the switch, remove the panel with switch and attach the green wire to the
switch terminal marked SUPPLY. Attach the red wire to the switch
terminal marked LOAD. Attach one end of the brown wire to the
switch terminal marked EARTH and the other end to a good
grounded metal surface under the dash. Re-attach the panel with
switch and secure with screws.
4. Before attaching wires to the power source, ensure the switch is in
the OFF position (see photo) At your 12V power source, connect the
green wire to positive 12V and the black wire to a good chassis
ground or negative post on the battery.
5. Replace the fuse and turn on your lights.
6. You’re done.
Parts Included
1 - LED Light Bar
2 - Brackets
4 - SS Bolts & Nuts
1 - Wiring Harness Kit
MOUNTING YOUR LIGHT
1. Add two SS bolts to the bar by inserting the bolt heads in the hole
at the end of the bar and sliding along slot in bar as shown in fig A.
2. Add the other two bolts in each of the none slotted holes in each of
the brackets. Lay the slotted part of each of the brackets over the
bolts on the bar. (fig B) Loosely tighten nuts so brackets can easily
be moved along bar.
3. Find a desired location for your light and if needed, drill two 5/16”
holes, position the brackets on the bar as needed and mount the
light. Up and down adjustments are made using the slots on the
bracket. Tighten all nuts securely.
KC HiLiTES, Inc., 2843 West Avenida de Luces, PO Box 155, Williams, AZ 86046 * 800-528-0950 * www.kchilites.com KC3265AP - 022213
Instructions for
KC #323 (60w) or #324 (120w)
LED Light Bar System
FOR OFF ROAD USE ONL
Y
Fig. B
Fig. A
Hole in Light
for Bolt Head
OFF
Vue de la page 0
1

Résumé du contenu

Page 1 - LED Light Bar System

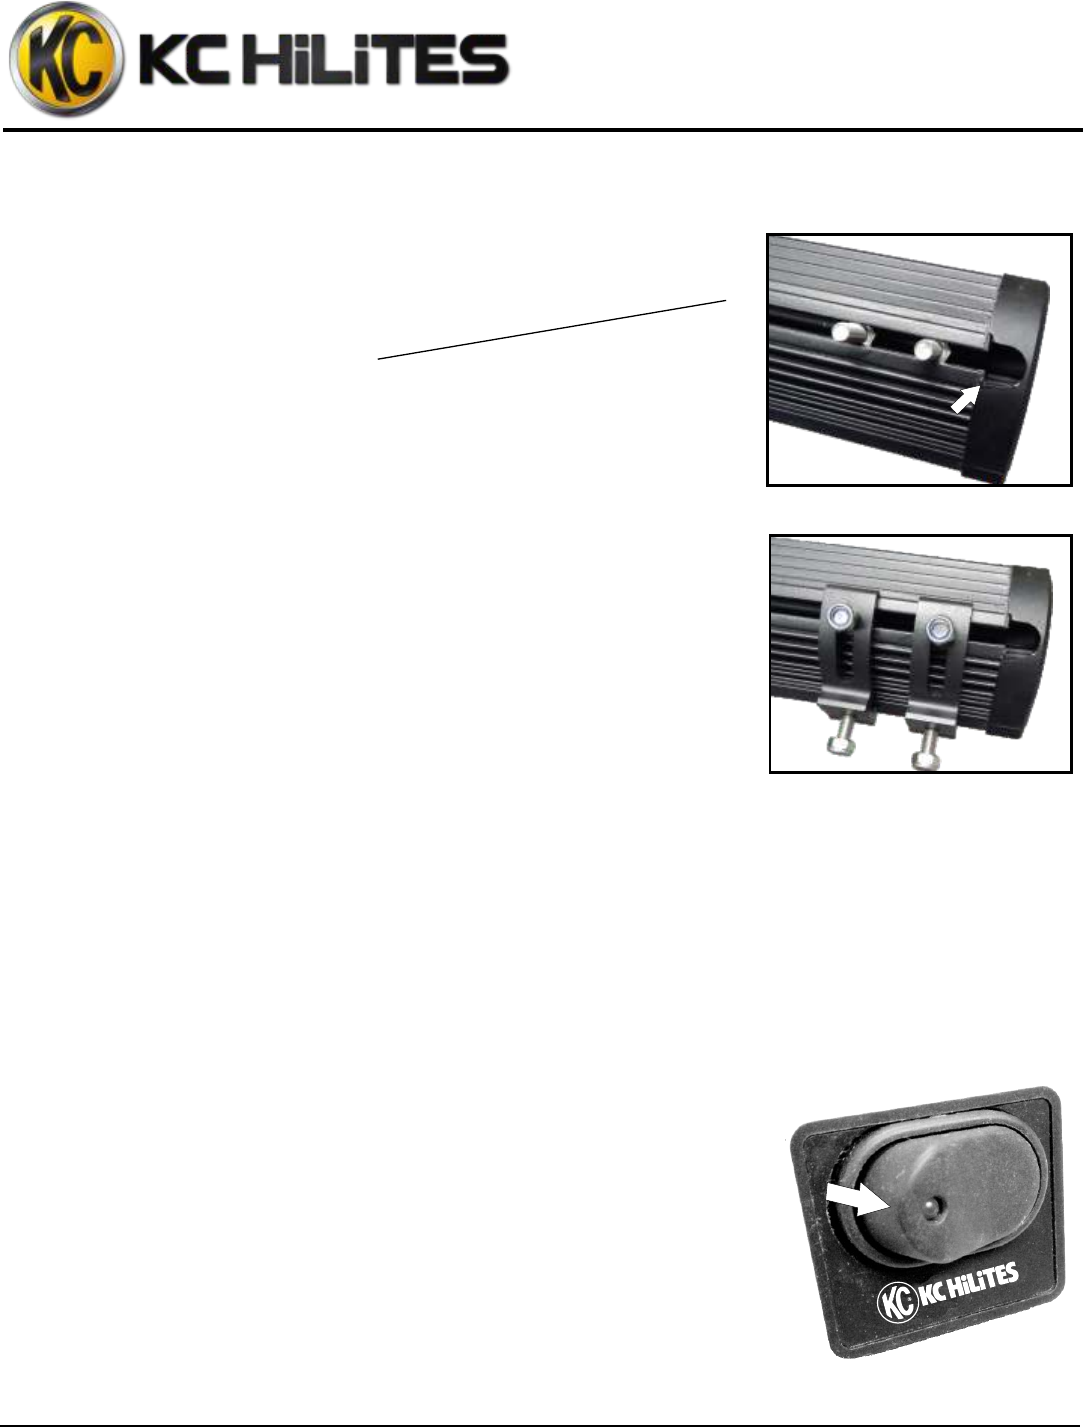
Bolts with Nutson BracketsThanks for choosing a KC HiLiTES product. We take pride in building the highest quality, best engineered systems possible. Y

Commentaires sur ces manuels

Pas de commentaire